First things first
Define which information, in what order, you’d like to see in the Ticker.
Everything at your time
With the “Playwatch Preferences” dialog, you can not just change the appearance of the ticker or change Hot-Key assignments, you can also define which information is displayed for every track and in what order. Furthermore you can specify, how all these informations are displayed within the Ticker.


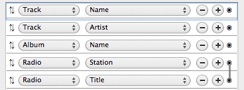
As long as you did not change anything, Playwatch will display the following information in the following order, for every track within your Media-Library: “Track-Name“, “Track-Artist“, “Album-Name“. Each Information on a single line.
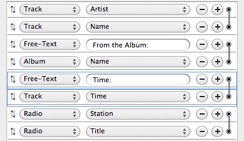
The adjustments to the right will result to the following: “Track-Name“ and “Track-Artist“ will be displayed together on the first line. The second line will contain “From the Album: Album-Name“. An on the third line: “Time: Track-Time“.
Free choice
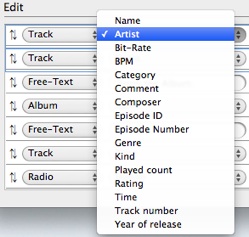
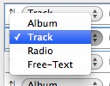
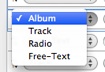
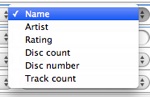
Information is grouped into three categories, out of which you can choose. Within the category “Album”, you get all informations regarding to albums. Within the category “Track” you’ll find everything regarding to tracks. Choose “Freetext”, to enter any text you want.

Make one from many
As you’ve seen before, you can join multiple rows, in a way, that they will later appear on one line in the Ticker. You can accomplish this by “drawing” a line between the ◉-Symbols of the two rows you want to join, from top to bottom. After you’ve completed the connection, a Text-Field is displayed. Enter any text you’d like to see between the two rows. There is no limit to the number of rows you can join. To disjoin two rows, click the upper ◉-Symbol of a connection.
Up and down
To change the order, of how the the rows will appear in the Ticker, just grab a row at the ⇅-Symbol and move it up or down to the desired position. Joined rows are moved as a block. You can use any row within the block to move it.

Joined Text
After joining rows, a text can be entered that is displayed between them. If you want to change this text at a later time, hover the mouse above the “Line” that is used to connect the two rows. After a short time a button is displayed. Use this to edit the text.
Never flying blind
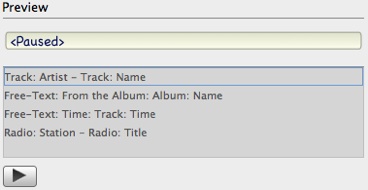
In the upper-part of the “iTunes-Info“ Dialog, there is a preview-area. With the Preview you can immediately see how the your changes will look like. You can even start a preview Ticker, to show you how your changes will look like, later in the real Ticker.


Never lose track
You may have noticed the small, blue focus lines shown around the rows in the editing and in the preview-area. These help you, to easily find the row in the preview, you are currently working on. As soon as you select a row in the editing-area, the same row gets selected in the preview-area. This is especially useful if rows are joined. If you select joined rows in the editing-area, only the single corresponding row in the preview-area, is selected. This makes it possible to see the results of connections immediately.

Add
To add rows, just click the “+“-Sign. New rows are always inserted below the row you’ve clicked. If rows are joined, the new row will be inserted below the block of joined rows.
Remove
To remove a row, click the “-“-Sign of the corresponding row. Single rows are removed immediately. If rows are joined, all rows are removed after you’ve confirmed their deletion.


Playwatch What‘s new Ticker Remote-Control Cover Preferences Misc.